Pages

Friday, April 29, 2011

Painting a Portrait..... with Chocolate!


Get ready to be blown away.


So, I was in the middle of cooking dinner and needed a quick "how to" on something. As usual I "google'd" my question and an interesting link about chocolate paintings of all things popped up. I clicked on it and was led to  http://eyecandy.nanakaze.net/?p=313.

Needless to say my jaw dropped. That's a painting! Made out of chocolate! That looks so real!  I knew I had to try this.

The first problem was deciding who to paint... I could paint myself but that would be a little vain.. LOL.. I could paint my husband but he would enjoy that too much : j

Then it hit me. Ill paint one of the most beautiful women Ive seen and she happens to be my favorite singer of all time - Sade. Shes just breathtakingly gorgeous and can I please look that good when Im her age?! Plus it will get me even more excited for her concert in June - Ive been waiting 10yrs since her last tour to see her! Alright - I'm ready. Lets go!


The eyecandy blog had great step by step pictures and I took a cue from that and decided to share step by step pictures of my project with you as well. The finished project was AMAZING and I couldn't believe how quickly it came together. There were a few mistakes I made which I will share with you so that it will avoided next time. Its all about learning from your mistakes! And because its so easy there can definitely be a next time!


1. Find a great black and white picture or one that you can make black and white. What you are looking for are distinct black, white and midtones areas.
 she's flawless! (from her "Best of" album cover)


2. Print out this picture. If there is any writing on it be sure to print it backwards as your final product will be a mirror image. Tape to a secure surface like sturdy cardboard. Then take parchment paper and tape it over the picture. You will basically be tracing over the picture with different layers of chocolate.
 fyi my parchment paper is unbleached which is why its brown and not white


3. Chop up dark chocolate or use dark chocolate chips like I did. Put them into a sandwich bag and let them sit in a bowl of hot water and melt. Also gather bamboo skewers which you will need.


4. Once the chocolate is melted cut a small tip off of the corner of your bag. Now whereever there is black in the picture trace over that area with the chocolate. Keep steady pressure while piping out with the bag. . Once you outline everything then fill in the black areas with the dark chocolate. Use the bamboo skewers to help you fill in the gaps. You can then use the bamboo skewers to dip into the chocolate to be more precise when tracing over the eyes, lips etc. Refrigerate while you prepare for the next step.

dark chocolate layer done! that was easy...


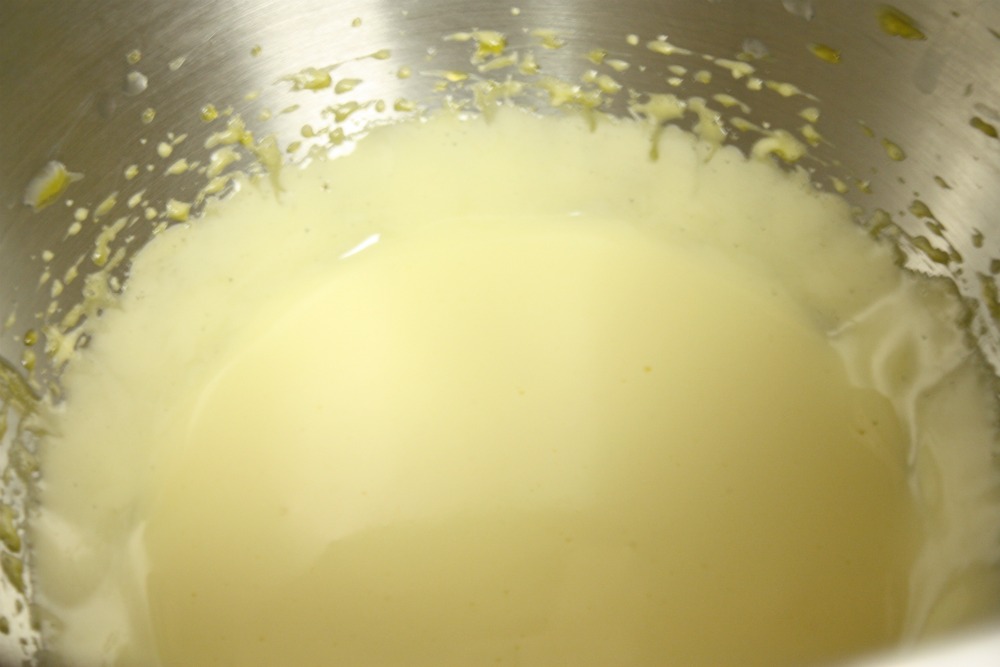
5. For the next step prepare and melt the white chocolate in the same way. Mix together the white and dark chocolate to get a good mid-tone color.

yum..


6. Take the picture out of the fridge and just like tracing fill in the mid-tone areas to give your painting its depth. If some of the lighter chocolate gets on the dark chocolate don't worry because it wont affect the end product. Once done, refrigerate.
mid-tone colors filled in - that was really quick!


7. After the chocolate has hardened (this doesn't take long 10 minutes or so) its time to do the last and easiest step. This is where I made a mistake and I will tell you how to avoid what I did wrong. First outline the outside of the entire picture with melted white chocolate.

Then pour white chocolate over the entire picture so that it is completely covered. (not pictured) It is VERY IMPORTANT that your chocolate is not too warm otherwise the chocolate underneath will melt. Smooth the white chocolate gently and evenly and be careful not to disturb the layers underneath. This is where I went wrong. I was a little heavy handed and ended up messing up the dark chocolate layer over one of the paintings eyes. Also tap the chocolate on the counter/table to get rid of trapped bubbles. Again, this is something I didn't do enough of so there were craters in my finished product. 
Last layer - seriously this is too easy..


8. Once you're done smoothing out the white chocolate layer, place back in the fridge or freezer. When the chocolate has hardened place another sheet of parchment paper over the painting and invert carefully. Peel away the parchment paper and voila! The finished product! 

     done!


Again I was completely surprised at how easy and how little time it took for how wonderfully professional it turns out! I hope you try it out and surprise someone special with a really unique gift!  (How great would it be to surprise your loved one with a personalized chocolate portrait as the topping on their next birthday cake??)


remember: be sure to tap out the trapped bubbles
or else youll be left with craters!

...and be careful when smoothing out your final layer of chocolate.
I wasnt :(

pretty good for a first try but will attempt to fix it....

after a few touch ups : j


Will leave you with my favorite song by Sade (and the beautiful lyrics). Enjoy : j


There must have been an angel by my side

Something heavenly led me to you
Look at the sky
It's the colour of love
There must have been an angel by my side
Something heavenly came down from above
He led me to you
He led me to you


He built a bridge to your heart

All the way

How many tons of love inside

I can't say


When I was led to you

I knew you were the one for me
I swear the whole world could feel my heartbeat
When I lay eyes on you
Ay ay ay
You wrapped me up in
The colour of love

You gave me the kiss of life
Kiss of life
You gave me the kiss that's like
The kiss of life

Wasn't it clear from the start
Look the sky is full of love
Yeah the sky is full of love

You gave me the kiss of life
Kiss of life
You gave me the kiss that's like
The kiss of life

You gave me the kiss of life
Kiss of life
You gave me the kiss that's like
The kiss of life

You wrapped me up in the colour of love
Must have been an angel came down from above
Giving me love yeah
Giving me love yeah

You gave me the kiss of life
Kiss of life
You gave me the kiss of life
Kiss of life


Wednesday, April 27, 2011

Herbed Turkey Meatloaf and Roasted Parsnip Puree

Many of you are in the same boat as I am.

There are certain foods you just cant/wont/dont eat. My list includes shellfish, pork, mushrooms (blech!) and red meat (except the occasional lamb for my hubby).

 However, I choose to focus on what I DO eat - which is surprisingly  A LOT! veggies, fish, chicken and turkey!

One of my favorite meals is a thick slice of delicious turkey meatloaf. Since everyone is always looking for a healthier alternative to their favorite meals, I wanted to share this as a leaner option for those who love the classic beef meatloaf.

I improvised when making the turkey meatloaf. This was the first time I started with a base (ground turkey) and just threw things in that I though would go work well together and taste good. Something I highly recommend. If it doesnt turn out well - youve learned and can just start over. But when it comes out delicious - your foodie confidence gets a nice boost : j  Heres what I came up with:


seconds please!

Herbed Turkey Meatloaf

Ingredients:
ground turkey (easily made vegetarian with veggie "meat")
salt
pepper
fresh thyme (its incredible what fresh herbs can do for meat!)
fresh sage
fresh rosemary
egg (substitute with olive oil to make this vegetarian/vegan or leave out all together)
breadcrumbs
yellow mustard
chopped onions
cumin powder
a dash of ground cinnamon/cloves/bayleaf
chili powder
paprika
add whatever else you like i.e grated zucchini, veggies

Tomato Glaze:
tomato paste
paprika
dashes of Worcestershire sauce
salt
pepper
cumin powder

Steps:
Put  all ingredients in a bowl and mix together
Form into a loaf shape (or use a loaf pan)
Spread glaze over top
Cover loosely with foil and bake for 45 minutes at 375degrees
Remove cover and bake for another 30 minutes or until when poked, juices run clear.

Roasted Parsnip Puree


So then, to accompany the yummy turkey meatloaf I had to make something healthier than the traditional mashed potatoes, right?  I went with something brand new to my kitchen - parsnips! I read several different recipes online for parsnip puree but the one that stuck out the most to me was the Roasted Parsnip Puree recipe found here: http://simplyrecipes.com/recipes/pureed_roasted_parsnips/  


beautiful fresh parsnips


buttery and sweet naturally! 


Whats on your list of "wont eat/touch/look at" foods ?

Saturday, April 23, 2011

Haldi & Henna Easter Eggs !


Easter is such a wonderful time of celebration! Whether you are celebrating Christ's ressurection or the blessing of having time with your family the joyous spirit of the holiday is all around!  

I decided to add an "Indian" twist to the holiday this year. Using a natural ingredient - haldi (turmeric) I dyed  eggs a bright cheery shade of yellow. This earthy and fragrant spice is usually used in cooking but  can also be found in homemade face masks and body scrubs! (honey + turmeric + sandlewood = amazing!) 

Mendhi (henna) would not leave the same deep orange hue on an egg's surface as it does on a bride's hands (believe me I tried and failed lol.. ) so I improvised with a couple of non-toxic henna-colored markers instead : j

Here's how to make your own batch of lovely Indian inspired Easter eggs!


Earthy, fragrant turmeric. Found at your local indian grocery store!


Add a few teaspoons of turmeric to a pot of water. Drop eggs into water
carefully and boil for ~ 6-10 minutes (as you would for soft or hard boiled
eggs) PS - you can eat the eggs after !


Remove eggs carefully and allow them to drain on
papertowels. Once cool, they can be decorated.


Using non-toxic markers, make designs with paisleys, flowers
dots, etc. Several templates can be found online.


so pretty!


My wedding day and henna'd hands : j
                                
                                  Happy Easter to everyone!

Thursday, April 21, 2011

Sour Cream Marinated Chicken Curry & Sour Cream Cucumber Mint Raitha

You may not automatically think of sour cream when you hear "indian food" but it's a wonderful secret ingredient that many who love indian cuisine use! Typically its yogurt that is used for marinades and raithas but those who have tried it know that sour cream (reduced fat) makes a wonderful rich, creamy substitute.

Try these two dishes and leave your guests wondering how you learned to cook so well while they ask for seconds and thirds!

Sour Cream Marinated Chicken Curry 

1. Prepare the dee.lish. marinade. Its super simple ! - all you need are the following ingredients (to taste) and a blender! Blend together: sour cream, fresh coriander, mint, chili powder, cumin powder, turmeric, salt, paprika, coriander powder, lemon juice, onion and a little bit of water.

sour cream is so yummy!


2. Cut up chicken thighs (with bone please! marrow makes this dish amazing) and rinse the chicken pieces with a mix of vinegar, water and turmeric. After rinsing the excess vinegar and turmeric off of the chicken pieces once more, add the blended marinade to the chicken pieces. Add a bit more sour cream to make a thicker marinade if you like! : j Put the chicken in the fridge while you prepare the rest of the ingredients.
cant wait til its done!
3. Get your "Mise en place" in order! Cut up onions, open a can of canned tomatoes, dice garlic, puree fresh ginger, grind the following whole spices into a powder (bay leaf, cardamom black and green, cinnamon, cloves, anise)  and set each of them aside.

Heat up a heavy bottomed pan (I love my dutch oven! Does some kind soul want to get me a set of Le Crueset? : j ) and add oil. Add mustard seeds to oil and once they start to pop, add the diced onions. Once they are nice and soft, add the ginger and garlic (the more the better if you ask me). Saute until all the ingredients are soft. Push the onions etc off to one side of the pot add a touch more oil and then add spices: chili powder, cumin powder, corriander powder, turmeric and paprika as well as the ground whole spices . Toast the powdered spices for a minute and then mix with the onions, etc. Add crushed tomatoes and then cook for a couple of more minutes.
This smells aaaammmaazzzinngg!!

4. Add the marinated chicken pieces (and a little bit of the marinade as well). Cover and cook for a good 20 -30 minutes stirring in between. Add extra water if needed. Once the chicken pieces are almost cooked, take the cover off and let the sauce reduce into a spicy flavorful gravy.

drool !

finger lickin' good!

Sour Cream Cucumber Mint Raitha

What's a better accompaniment to a spicy yummy chicken curry than a cool creamy raitha? Heres how!

1. Peel, seed and shred cucumbers. Add salt to the shredded cucumbers and let that sit for 5 minutes. (This helps to draw out excess water from the cucumbers) 


2. Squeeze out the excess water. Add the shredded cucumber to sour cream.

3. Add cumin seeds, cumin powder and salt  and mix.

4. Add chopped mint, mix and serve!


I hope this helps to demystify good home cooked indian food a little bit. I also hope you get a chance to try these two amazing dishes! and by the way it gets better and tastier with practice!  : j


Sunday, April 17, 2011

365 Days of Vegan Dishes!

Vegetable Gyoza by Joan Hsu


Have you ever considered giving up meat and/or all animal by-products (eggs, dairy, leather, honey) ? With the "Meatless Mondays" movement gaining momentum it seems to be all the rage. Or are you already a vegetarian or vegan looking for inspiration? If so this post today is dedicated to you!


Truth be told I actually considered becoming a vegetarian at one point and I even tried it for a while - BUT that only lasted for 3 months! My mom's chicken curry was my tempter and I happily obliged. : j


Most likely because I couldn't become one (err..choose... : j ) much like marathon runners and computer programmers I have nothing but admiration for those who choose the vegan lifestyle. 


One such individual to whom I was introduced was Mrs. Joan Hsu.


Mocha Almond Biscotti by Joan Hsu
Joan and I are both Seventh-Day Adventists; where healthy living including vegetarianism and veganism is encouraged. As such, I have come across many vegetarians vegans and their yummy food over the years.


However, Joan is doing something quite different and remarkable from any of them.  She made the transition  from vegetarianism  to veganism, but she didn't stop there. Joan has decided to share  one vegan recipe for each day this year! She uploads 7 new recipes each Sunday along with beautiful pictures to her facebook account. She has shared over 100 unique and delicious recipes so far and will soon reach the 365 recipe mark!


She has made everything from simple sweet plantains, hearty bean and barley soup and decadent desserts to creative vegan takes on traditional dishes like macaroni and "cheeze". 


After looking through her album of delicious treats I knew many more would love to hear about her story and try her recipes! 


Here is what Joan wanted to share in her own words:


Curried Lentil Soup by Joan Hsu
"The idea for this project was a result of several events. First, a couple of years ago, having to go on my daughter Janae's diet for a while (she's allergic to eggs, dairy, soy, wheat, and nuts, as well as cats and dogs) which, while not the greatest experience in the world, made me realize that a vegan diet was very possible for me. After I got off Janae's diet, my husband kept telling me we should go vegan, but I wasn't ready for that yet. Then my friend Jed did a "photo a day" for every day in 2010, which I thought was really awesome. Towards the end of last year I was able to watch the movie "Julie and Julia" which is about a lady who did a blog of Julia Child's cookbook and made each recipe once a day for a whole year, which I thought was really cool. Finally I saw the movie "Forks Over Knives" (coming to theaters March 10, 2011). The movie made me realize that I had to do something about my chocolate and dairy (mainly cheese) intake. I eat waaayy too much of both! As a result, I gave away or threw out all dairy from the fridge, and our family is now vegan (at least at home).

Instead of posting a new recipe daily, I'll be posting seven recipes every Sunday. Some of the recipes are my own original ones but some are just copied or modified from cookbooks or the Internet. I know I'm taking on a big project here, but this is not only for my health, but for my family, and becoming vegan will teach me self-control when it comes to food. Also most people, when they hear the term "vegan", think "bland". But it's not like that at all, as long as you have some good recipes to work with. So I hope you'll join in with me on this ride, try some recipes for yourself, and let me know what you think!"


Indian Fajita by Joan Hsu

Heres the recipe by Joan for the beautiful Vegetable Gyozas seen at the top of this post:

#34 - Vegetable Gyoza

This is actually easy to make. Try making them for Chinese New Year.

2 cups, loosely packed minced napa cabbage
1/4 tsp salt
2/3 cup vegeburger
1/4 Tbsp freshly grated ginger
1 cloves garlic, finely minced
1/2 Tbsp green onion,minced
1 1/2 tsp miso paste
1/2 tsp sesame oil
1/2 t red chili pepper
1/8 tsp sugar
20 dumplings wrappers

dipping sauce:
3 Tbsp soy sauce
1 1/2 Tbsp rice vinegar
Several drops of sesame oil

Combine salt and cabbage and let sit 10 minutes. Squeeze all water out of cabbage. Add the rest of the ingredients except wrappers, well combined. Have a small bowl of water ready. Lay wrapper on a dry work
surface and place a heaping tsp of mixture in the center of wrapper. Moistened half of the edges of the wrapper and fold by pleating the edges. Heat 1/2 tsp sesame oil on medium-high heat. Place dumplings with the pleated-wrapper edge up. Cook 3 minutes until brown on bottom. Carefully add 1/4 cup water and when hissing and splattering die down, place lid on to trap in the moister and simmer. After 2 minutes, when
wrapper appear slightly translucent, remove the lid and raise the heat slightly. Continue to cook until all water has eveaporated and only oil remains (about 2 minutes). Make dipping sauce by whisking the soy sauce and vinegar together then the sesame oil.


If you would like to take a look at her album on facebook - here is the link! (link and all the above pictures are by Joan Hsu and have been shared with permission from Joan)


So go on. Try these recipes and see what veganism tastes like! (even if its only for a couple of months) : j


Monday, April 11, 2011

Cherry Blossoms, A Wedding and Mini Japanese Cheesecakes!

(online stock photo not by OEEF)
  • I loved being back home in MD/DC and seeing all of my family and friends! What made it even more special this time was that one of my best friends got married! 

The lovely couple sharing a laugh
among the beautiful cherry blossom trees!
I was also lucky enough to be in town when the cherry blossom trees were in full bloom all over MD, DC and VA. What a wonderful backdrop for an even more beautiful wedding weekend. On the day of the wedding, the bride and groom were blessed with sunshine and beautiful weather. Also the gorgeous cherry blossoms were at their peak of full bloom! The entire bridal party got a leisurely limousine ride into DC and then took pictures among the elegant trees and monuments.

A quick wiki search will reveal that "The Cherry Blossom Festival in DC commemorates the March 27, 1912, gift of Japanese cherry trees from Mayor Yukio Ozaki of Tokyo to the city of Washington DC. Mayor Ozaki donated the trees in an effort to enhance the growing friendship between the United States and Japan and also celebrate the continued close relationship between the two nations."

The scene in DC was breathtaking; the water rippling from the cool breeze, sun shining, cherry blossom trees in full bloom  and glimpses of the majestic monuments in the background. Beautiful.

With the recent tragedies that have befallen Japan (1 month today) and with the trees all around my hometown as a reminder- I, like many of you, have had Japan on my mind. 

With that, its only fitting to share an elegant Mini Japanese Cheesecake recipe! (made with the mini cheesecake pan given to me as a housewarming present by my BFF!) .

Here is my step by step pictorial guide on how to make Mini Japanese Cheesecakes! Dont let the term "cheesecake" fool you. The Japanese version is super light, creamy and cottony soft. You can totally have a second helping : j

  • (recipe from allrecipes.com)

  • 1 (3 ounce) package cream cheese
  • 1/4 cup milk
  • 2 egg yolks
  • 1/4 cup white sugar, divided
  • 2 egg whites
  • 1/3 teaspoon cream of tartar
  • 3 tablespoons all-purpose flour
  • 1 1/2 tablespoons cornstarch

  • Steps:
  • Preheat the oven to 350 degrees F and grease mini cheesecake pan. 
    Then warm the cream cheese and milk in a small saucepan over medium-low heat. 
    Cook, stirring occasionally, until cream cheese is melted. Remove from the heat and set aside.


In a medium bowl, beat egg yolks and half of the sugar until light and fluffy using an electric mixer.


Gently mix in or fold the cream cheese mixture into the yolks


Sift the flour and cornstarch.


Stir sifted flour into egg yolk and cream mixture until blended.


In a separate bowl, using clean beaters, whip egg whites with cream of tartar until  foamy.


Gradually sprinkle in the remaining sugar and continue whipping to stiff peaks.


Fold egg whites into the cream cheese mixture.


Pour into the prepared cake pan. *Instead of a traditonal waterbath, I just poured water into a shallow pan that sat one rack right below my mini cheesecake pan.*
Bake for 20 minutes in the preheated oven, then reduce the heat to 300 degrees F. Continue to bake for 15 more minutes.


 Let the cake cool before removing from the pan.
Run a knife around the outer edge of the cake pan, and invert onto a plate to remove the cake.


Top with freshly made whipped cream and a few slices of fruit. 
The whipped cream was light and the pear slices were perfectly sweet and delicate!


The American Red Cross and other organizations have set up simple ways for you to give. You can support the rebuilding efforts through a phone call, by visiting the website or through a simple text message. For more information on how you can help visit : http://ow.ly/4y5rV